# Power BI
## Requirements
Before you begin the process of connecting e6data with Power BI, make sure you have the following pre-requisites in place:
* Establish a [Gateway connection](https://docs.e6data.com/product-documentation/connectivity/endpoints) in your cluster.
* If it’s a serverless cluster, just enable gateway connectivity toggle button under connection details of cluster.
* Power Bi desktop . [Link to download](https://powerbi.microsoft.com/en-us/downloads/)
* Download the Starbrust ODBC driver and install the driver. [link](https://starburstdata-downloads-v2.s3.us-east-2.amazonaws.com/odbc/2.1.7.1009/StarburstODBC64bit-2.1.7.1009.msi)
* Acquire the necessary credentials:
* User Name: Used for logging into e6data.
* Password: [Token generated](https://docs.e6data.com/product-documentation/user-settings/personal-access-tokens-pat) by the user.
* Host Name: The host IP of the cluster for the connection.
* Database (optional): Name of the database in the given catalog.
* Catalog (optional): Name of the catalog.
### Steps for connecting to e6data
Follow these simple steps to connect e6data with Power BI:
* **Step 1: Start Power BI desktop**
* Open and Start Power BI desktop we we already have installed on our laptop
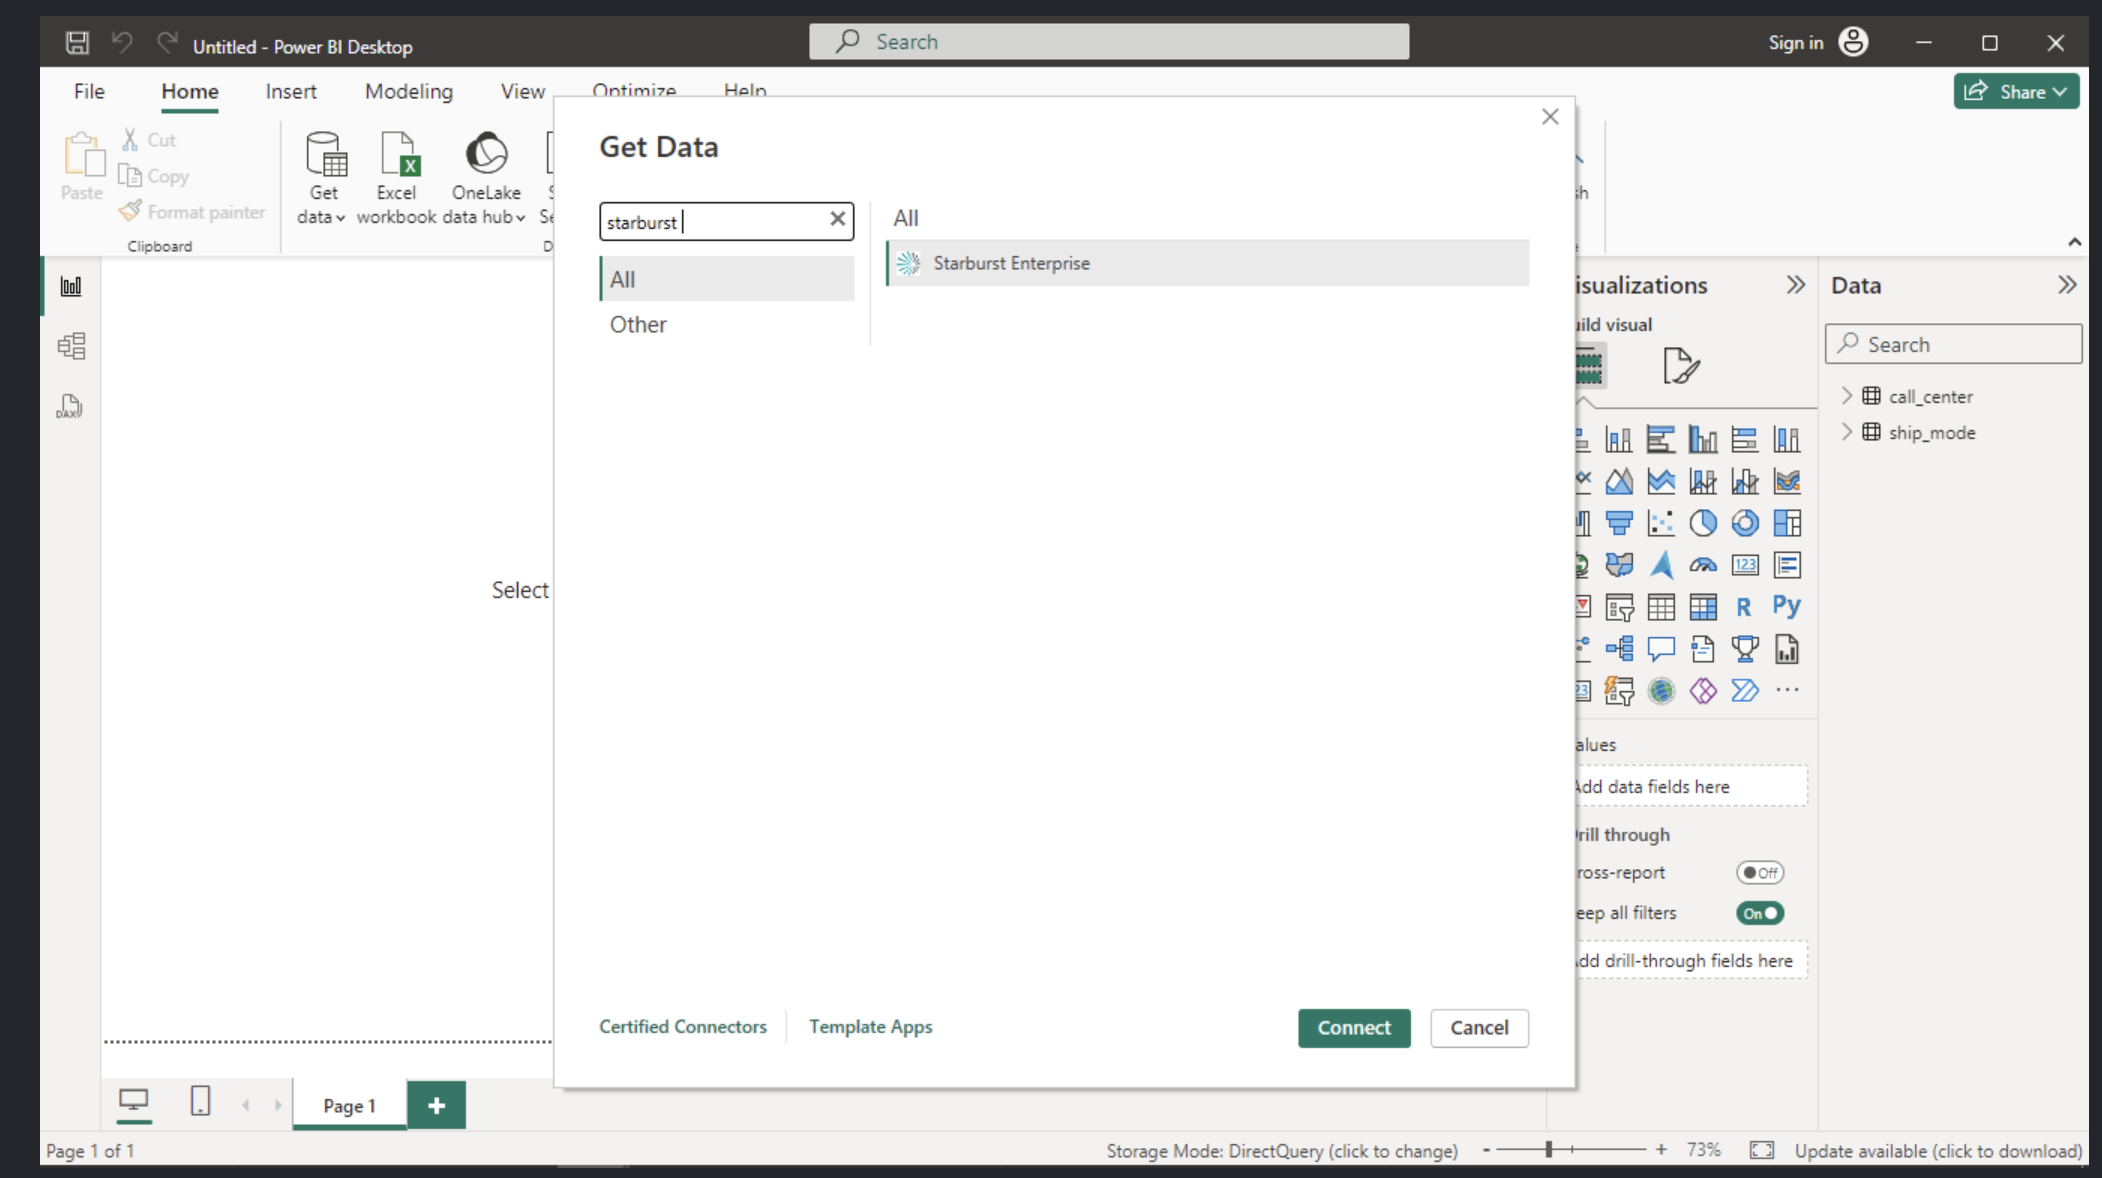
* **Step 2: Go to Get Data Section**
* Click on get data and search for starburst connector and click on connect
New Report → Home → Get data → starburst connector
Power BI Desktop
* **Step 3: Establish the Connection**
* Provide the below details to make the connection with e6data
1. **Host:** The host IP of the cluster for the connection.
2. **Port:** 443
3. **Catalog (optional):** Name of the catalog
4. **import/DirectQuery:** Select among import/DirectQuery based on requirements
* While using custom SQL query please ensure to give path to table as`db.schemaname.tablename`
*
```
Power BI Desktop
```
```
* Click on OK and it will redirect to new tab
* Choose LDAP
* User Name: Used for logging into e6data.
* Password: Token generated by the user.
* click on connect
```
### Step 4 : Adding Databases
* Select the desired catalog and tables for creating visualisation and click load
Power BI Desktop
Power BI Desktop
### Step 5 : Utilize Power BI Features
* With the successful connection, you can now create charts and run SQL queries using PowerBI.
By following these steps, you'll establish a connection between e6data and Power BI, enabling you to seamlessly integrate and visualize your data.
**Note**:
If you face below error stating:
`SSL Error: SSL certificate problem: unable to get local issuer certificate`
We need to download and install 5 certificates to tackle this issue by following the below steps:
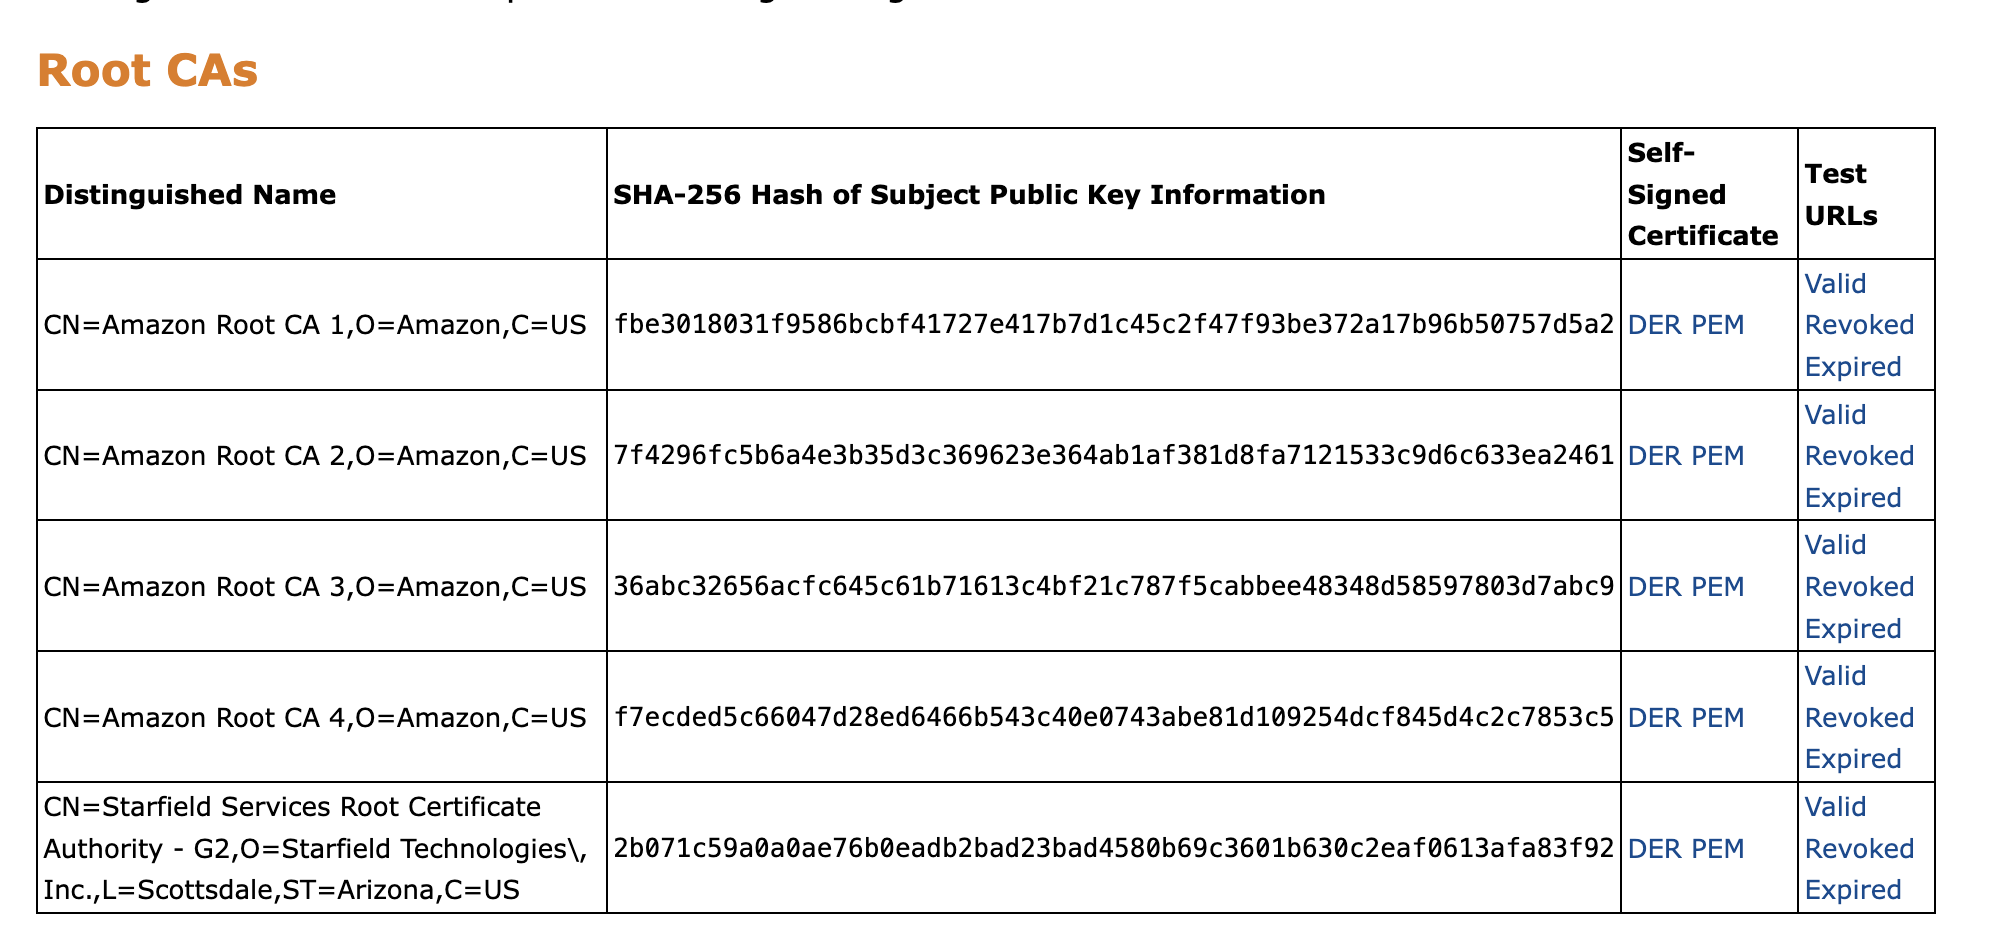
* Navigate to the [Amazon Trust Repo](https://www.amazontrust.com/repository/) page.
* Under the Root CA’s will be the required 5 certificates.
Root CAs
* In that, under the Self-Signed Certificate column, choose the DER option for all 5 certificates to download.
* Once downloaded, open the certificate. A dialogue box will appear.
* Select `Install Certificate -> Current User -> Automatically select the certificate store -> Finish.`
* You should get a installation successful popup.
* To validate the installation, navigate to `Start -> Manage Computer certificates`
* On the left-side panel, `Trusted Root Certification Authorities -> Certificates`
* You must see Amazon Root CA 1, Amazon Root CA 2, etc…
* Restart PowerBI and re-establish the connection.
{% hint style="info" %}
**Limitations:**
* Drag and Drop of date and datetime data type is not supported.
* As of now we don’t support Joining multiple tables in data model of power BI. However we can use custom sql query for joining.
* We may not be supporting all the functions in measures and calculated columns.
{% endhint %}
-20240605-090528.png?alt=media&token=2414bc0b-6d33-4a07-bf7a-7e412b814f53)
-20240605-090641.png?alt=media&token=8f5f7590-3865-4dda-baa1-47360ed4ba5f)
-20240605-091104.png?alt=media&token=4a77d647-330d-4c44-8b1e-9d438c2b6f81)
-20240605-091108.png?alt=media&token=7786d8c6-5ab0-4cb1-b4fd-ab49a2102e45)