> For the complete documentation index, see [llms.txt](https://docs.e6data.com/product-documentation/llms.txt). Markdown versions of documentation pages are available by appending `.md` to page URLs; this page is available as [Markdown](https://docs.e6data.com/product-documentation/connectors-and-drivers/dbvisualiser.md).
# DbVisualiser
Access and manage databases using the DbVisualizer tool.
DbVisualizer is a versatile SQL editor and universal database tool, available as an open-source application for local installation on your workstation. By leveraging the JDBC driver, DbVisualizer enables seamless access to e6data clusters, empowering users with efficient database management capabilities.
## Requirements
* Users of the e6data cluster must use DbVisualiser 23.2.4 or newer.
* Install the latest [e6data jdbc driver](/product-documentation/connectors-and-drivers/jdbc-driver.md)
## Connection
Get the necessary [connection information](broken://pages/amzyzgmFtIIvAWabchFw) for your cluster:
* JDBC URL
* Username
* Password ([Personal Access Token](broken://pages/BO9IJX3Hj4YaBgnZ1VGK))
Connection string for Direct Connectivity Endpoint
Syntax of the JDBC URL required to establish a DB Visualiser connection with the e6data cluster when connecting using the Direct type of connectivity in endpoints:
{% code overflow="wrap" %}
```
jdbc:e6data://:/database=&catalog=
```
{% endcode %}
Connection string for TLS Connectivity Endpoint
Please refer to the syntax of the JDBC URL required to establish a DB Visualiser connection with the e6data cluster when connecting via TLS type of connectivity in endpoints:
{% code overflow="wrap" %}
```
jdbc:e6data://:&catalog=&secure=true&cluster-uuid=
```
{% endcode %}
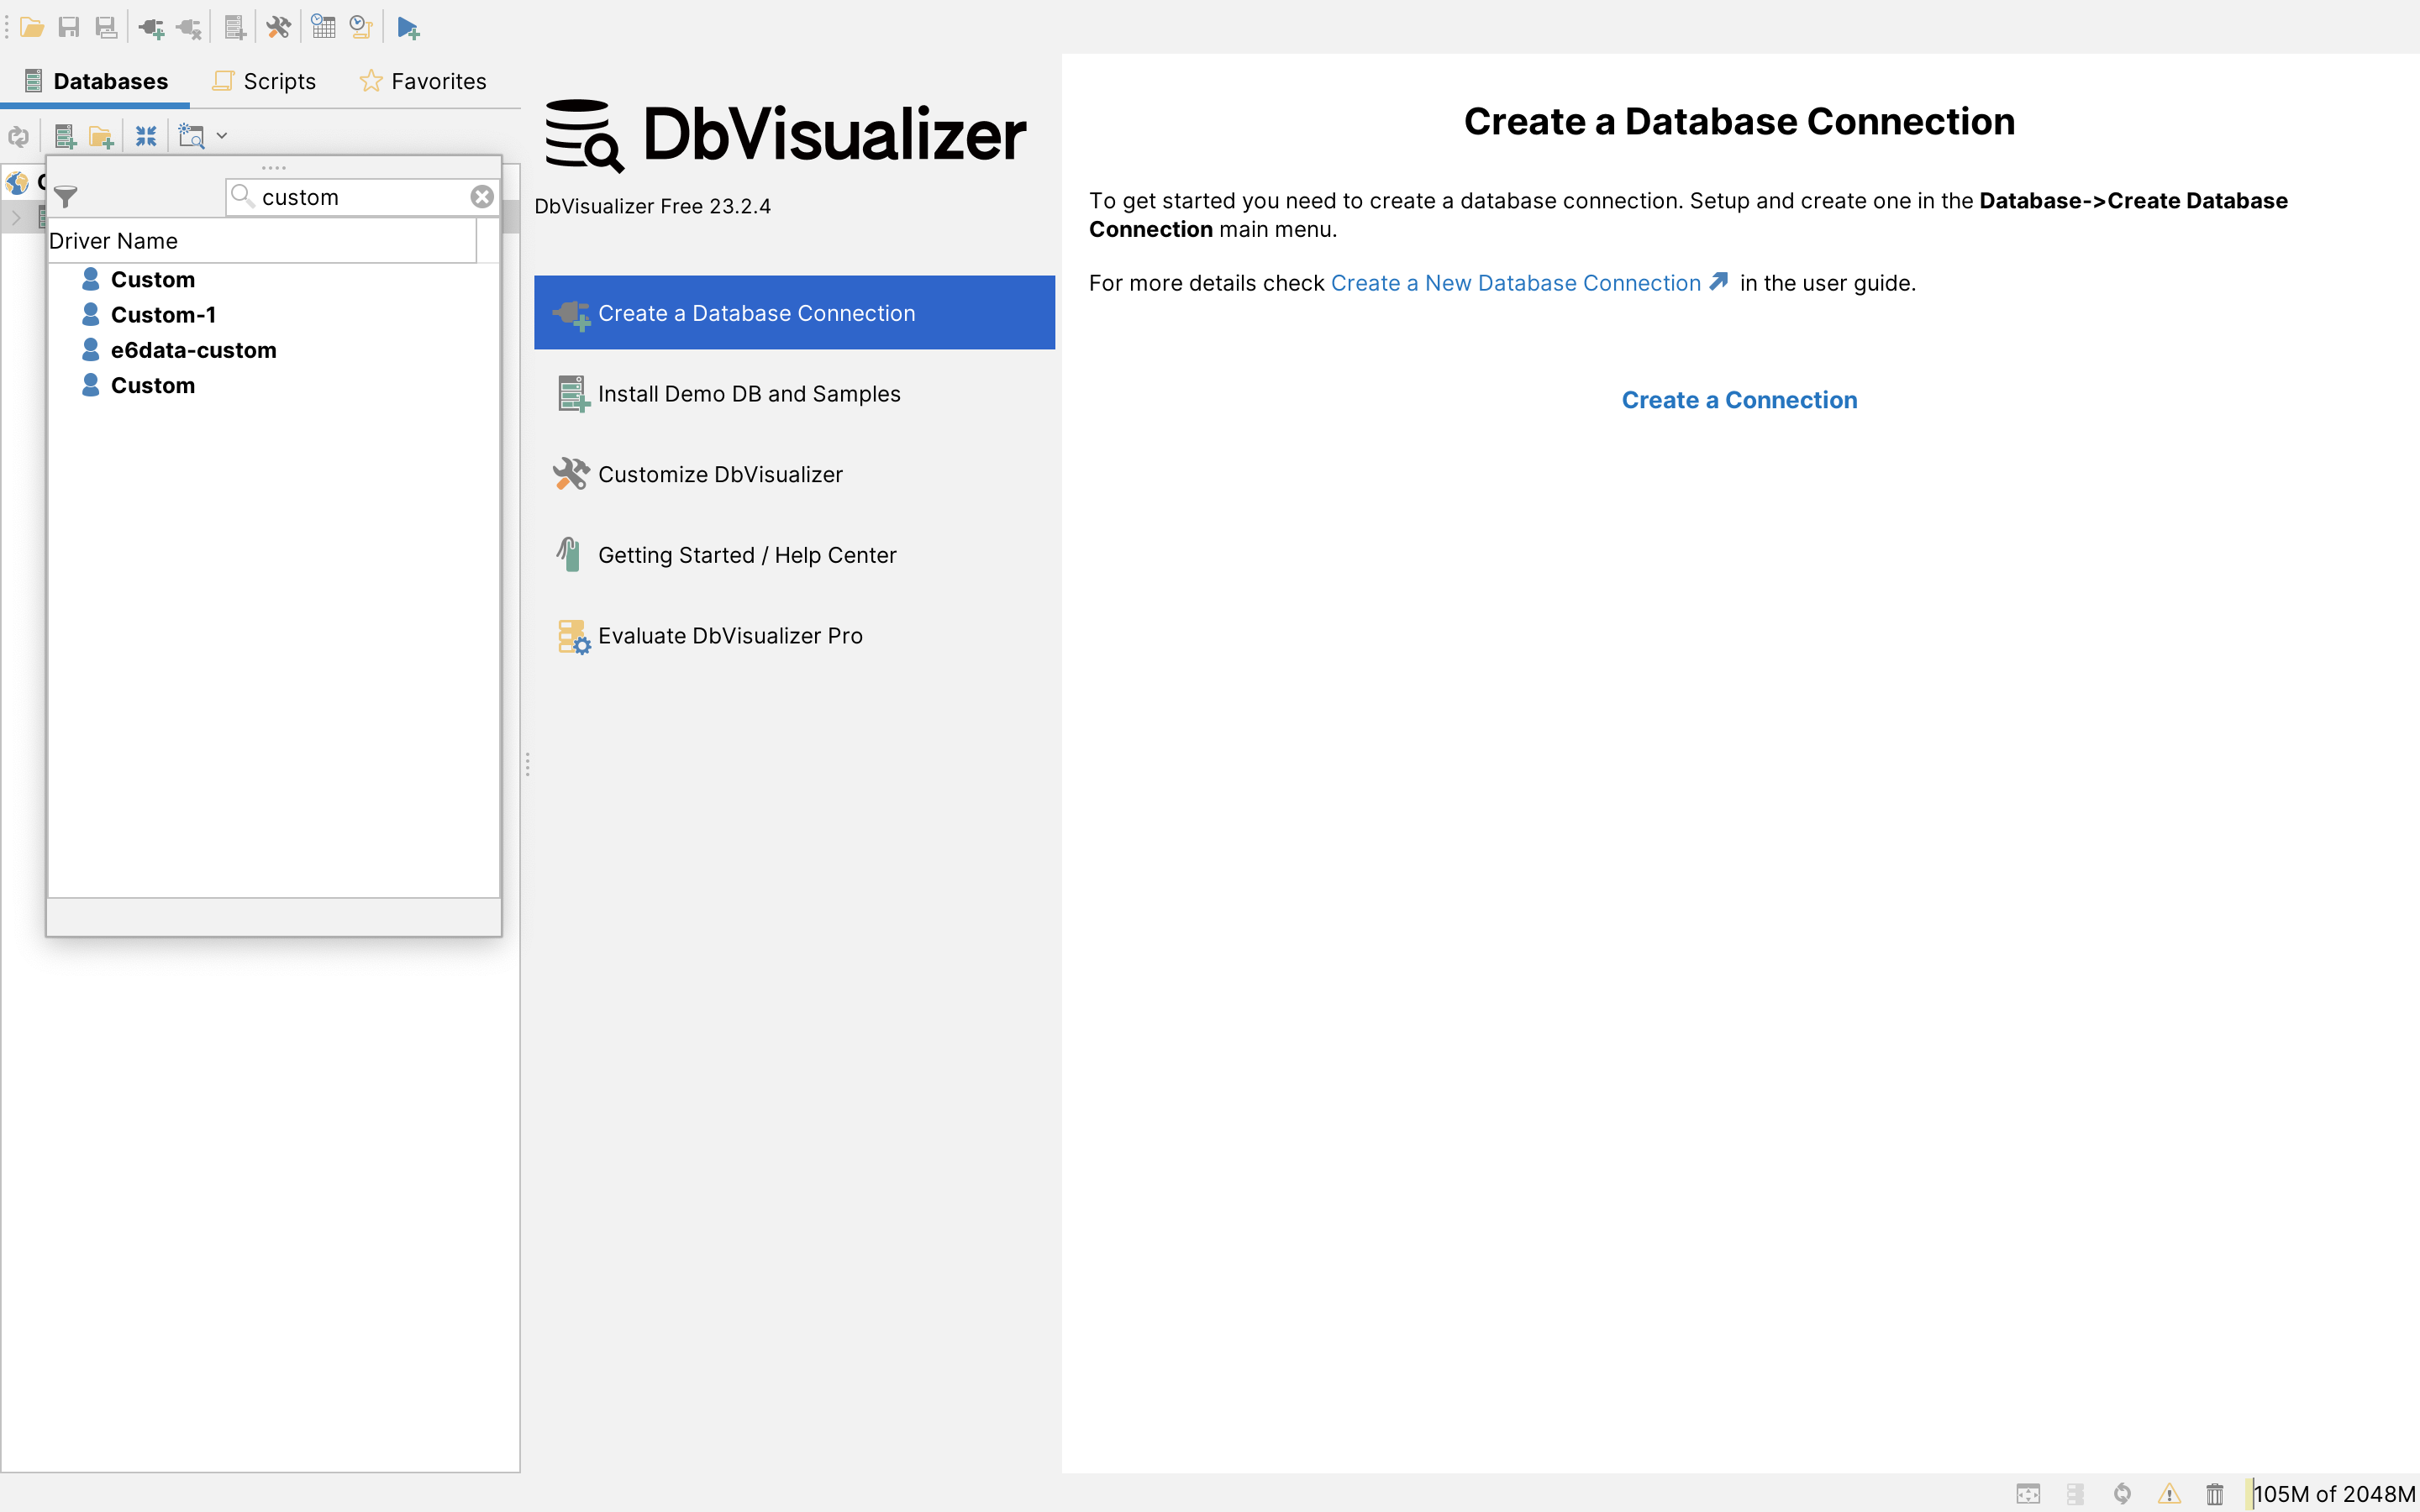
1. Click on "Create Database" to establish a new connection.
2. Search and select "Custom" from the connection list.
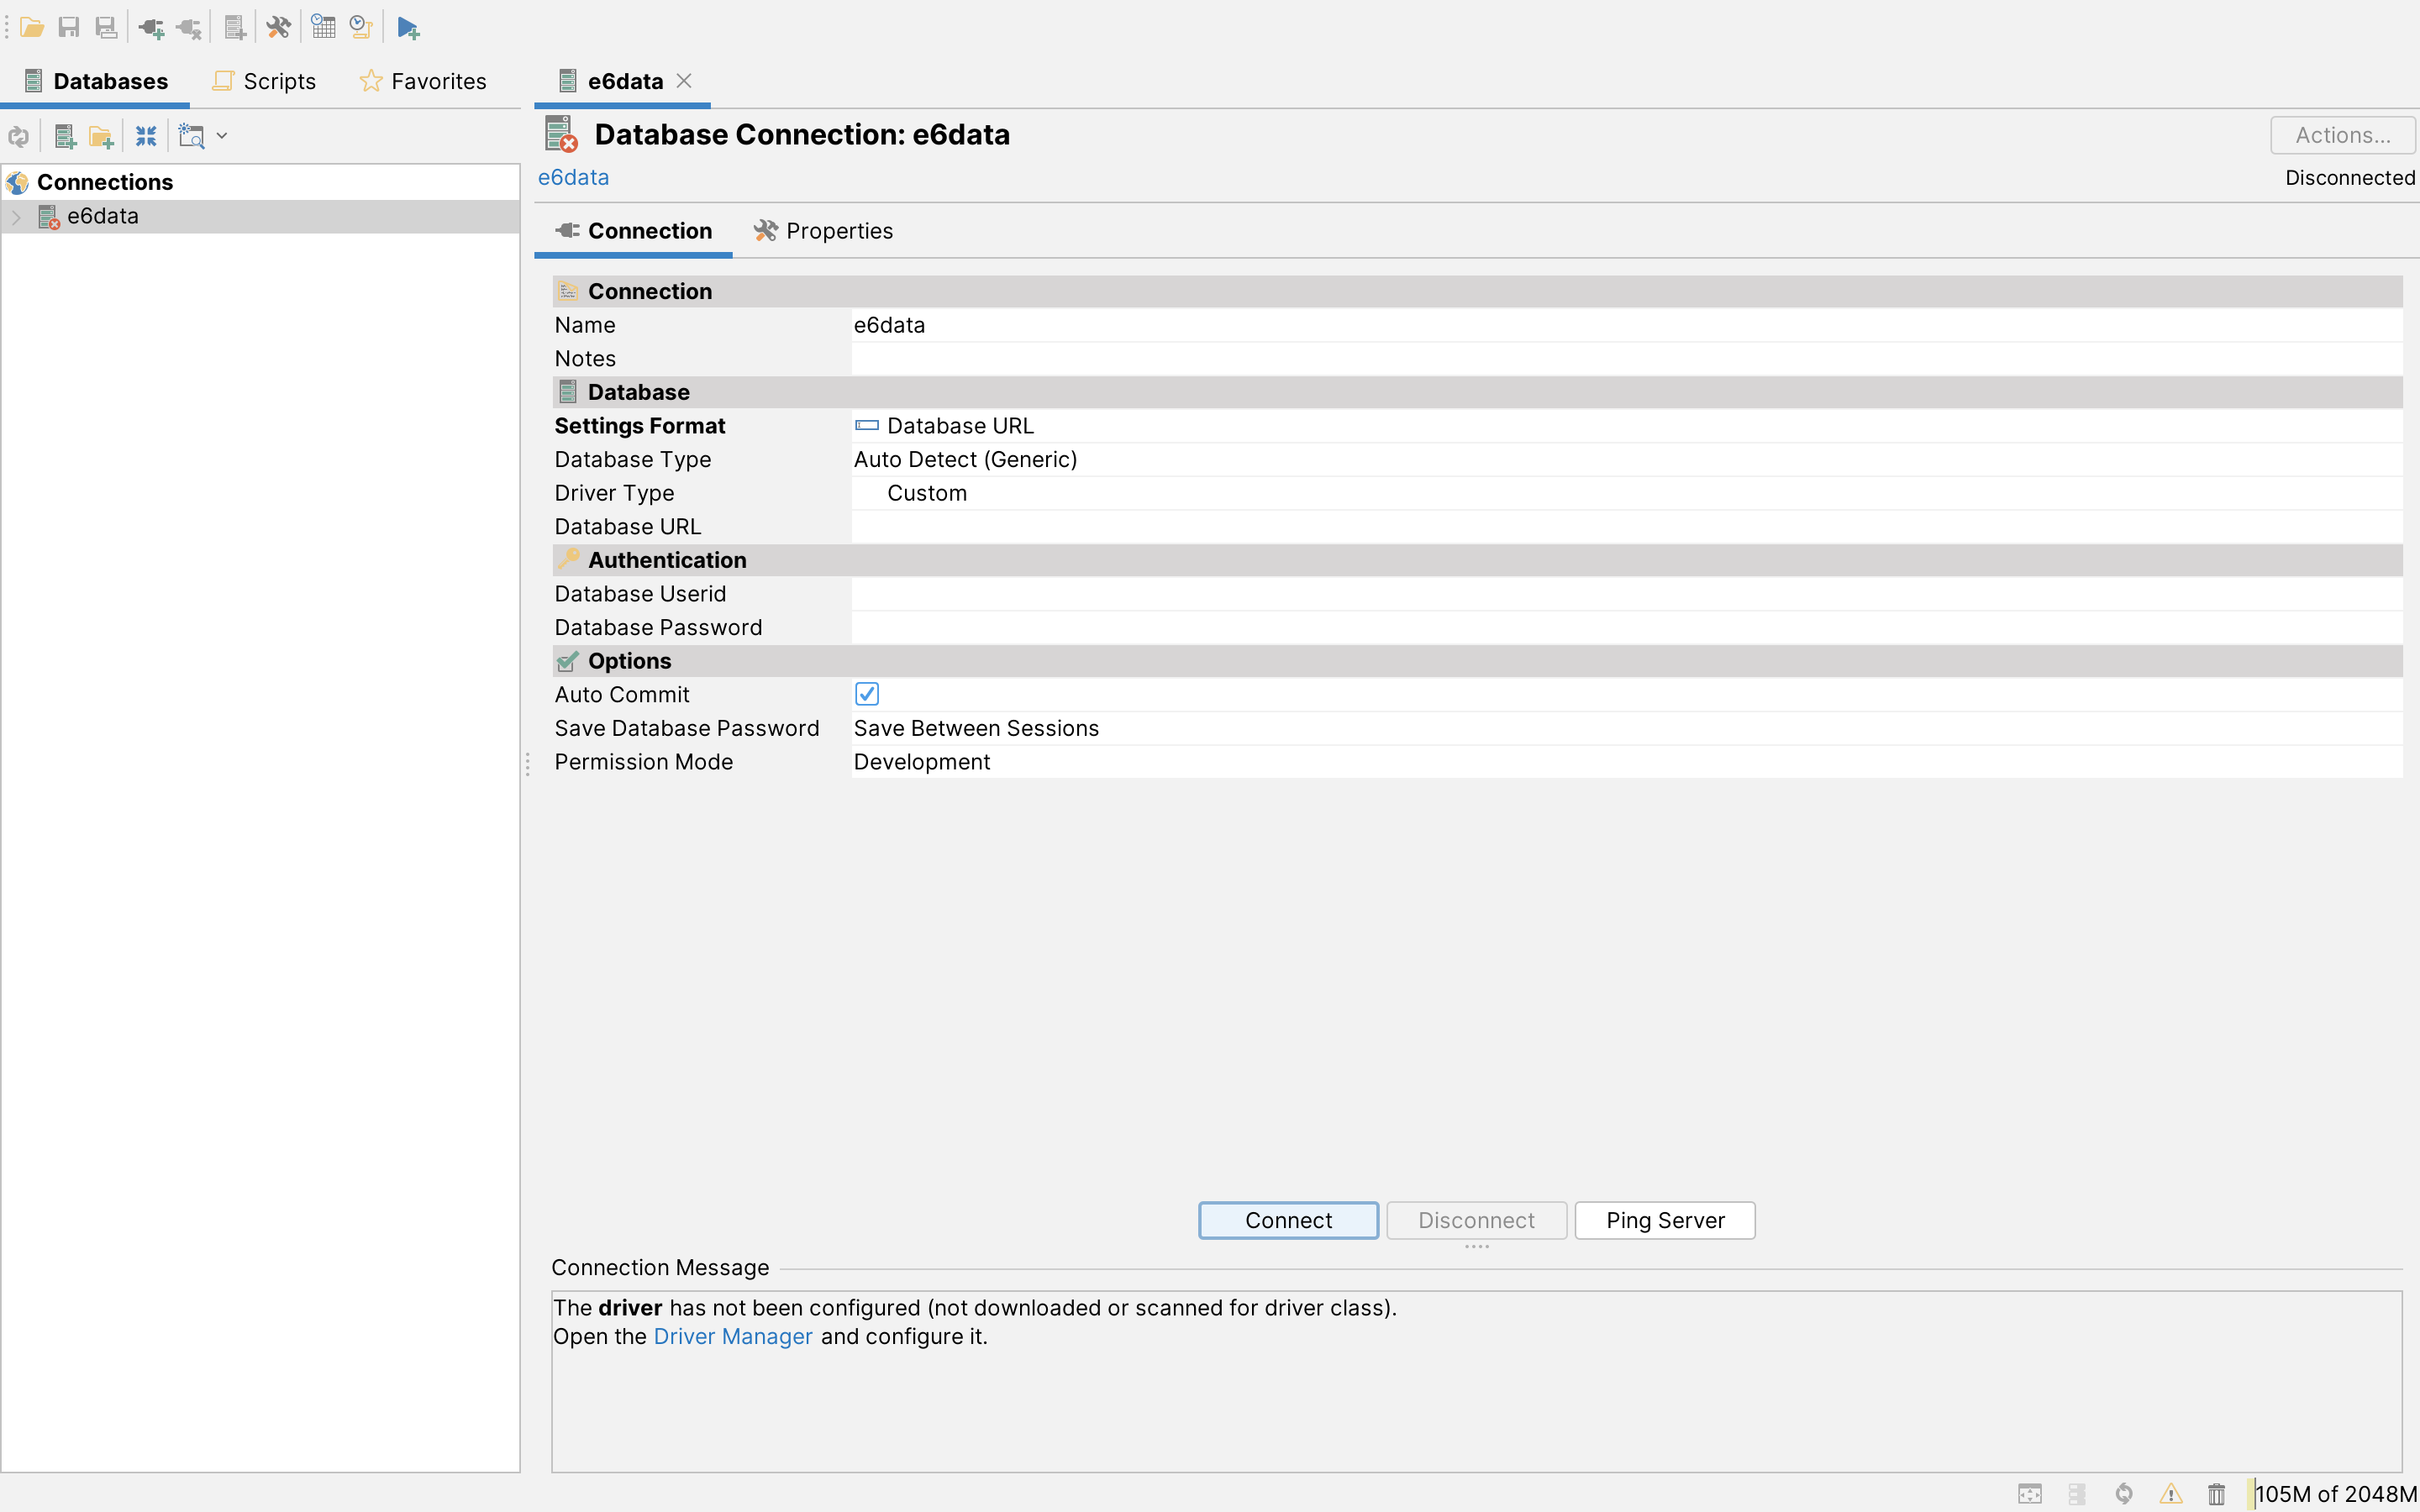
3. Give the appropriate name for the driver.
4. In the settings format, select the database URL.
5. Give the connection string in the database URL.
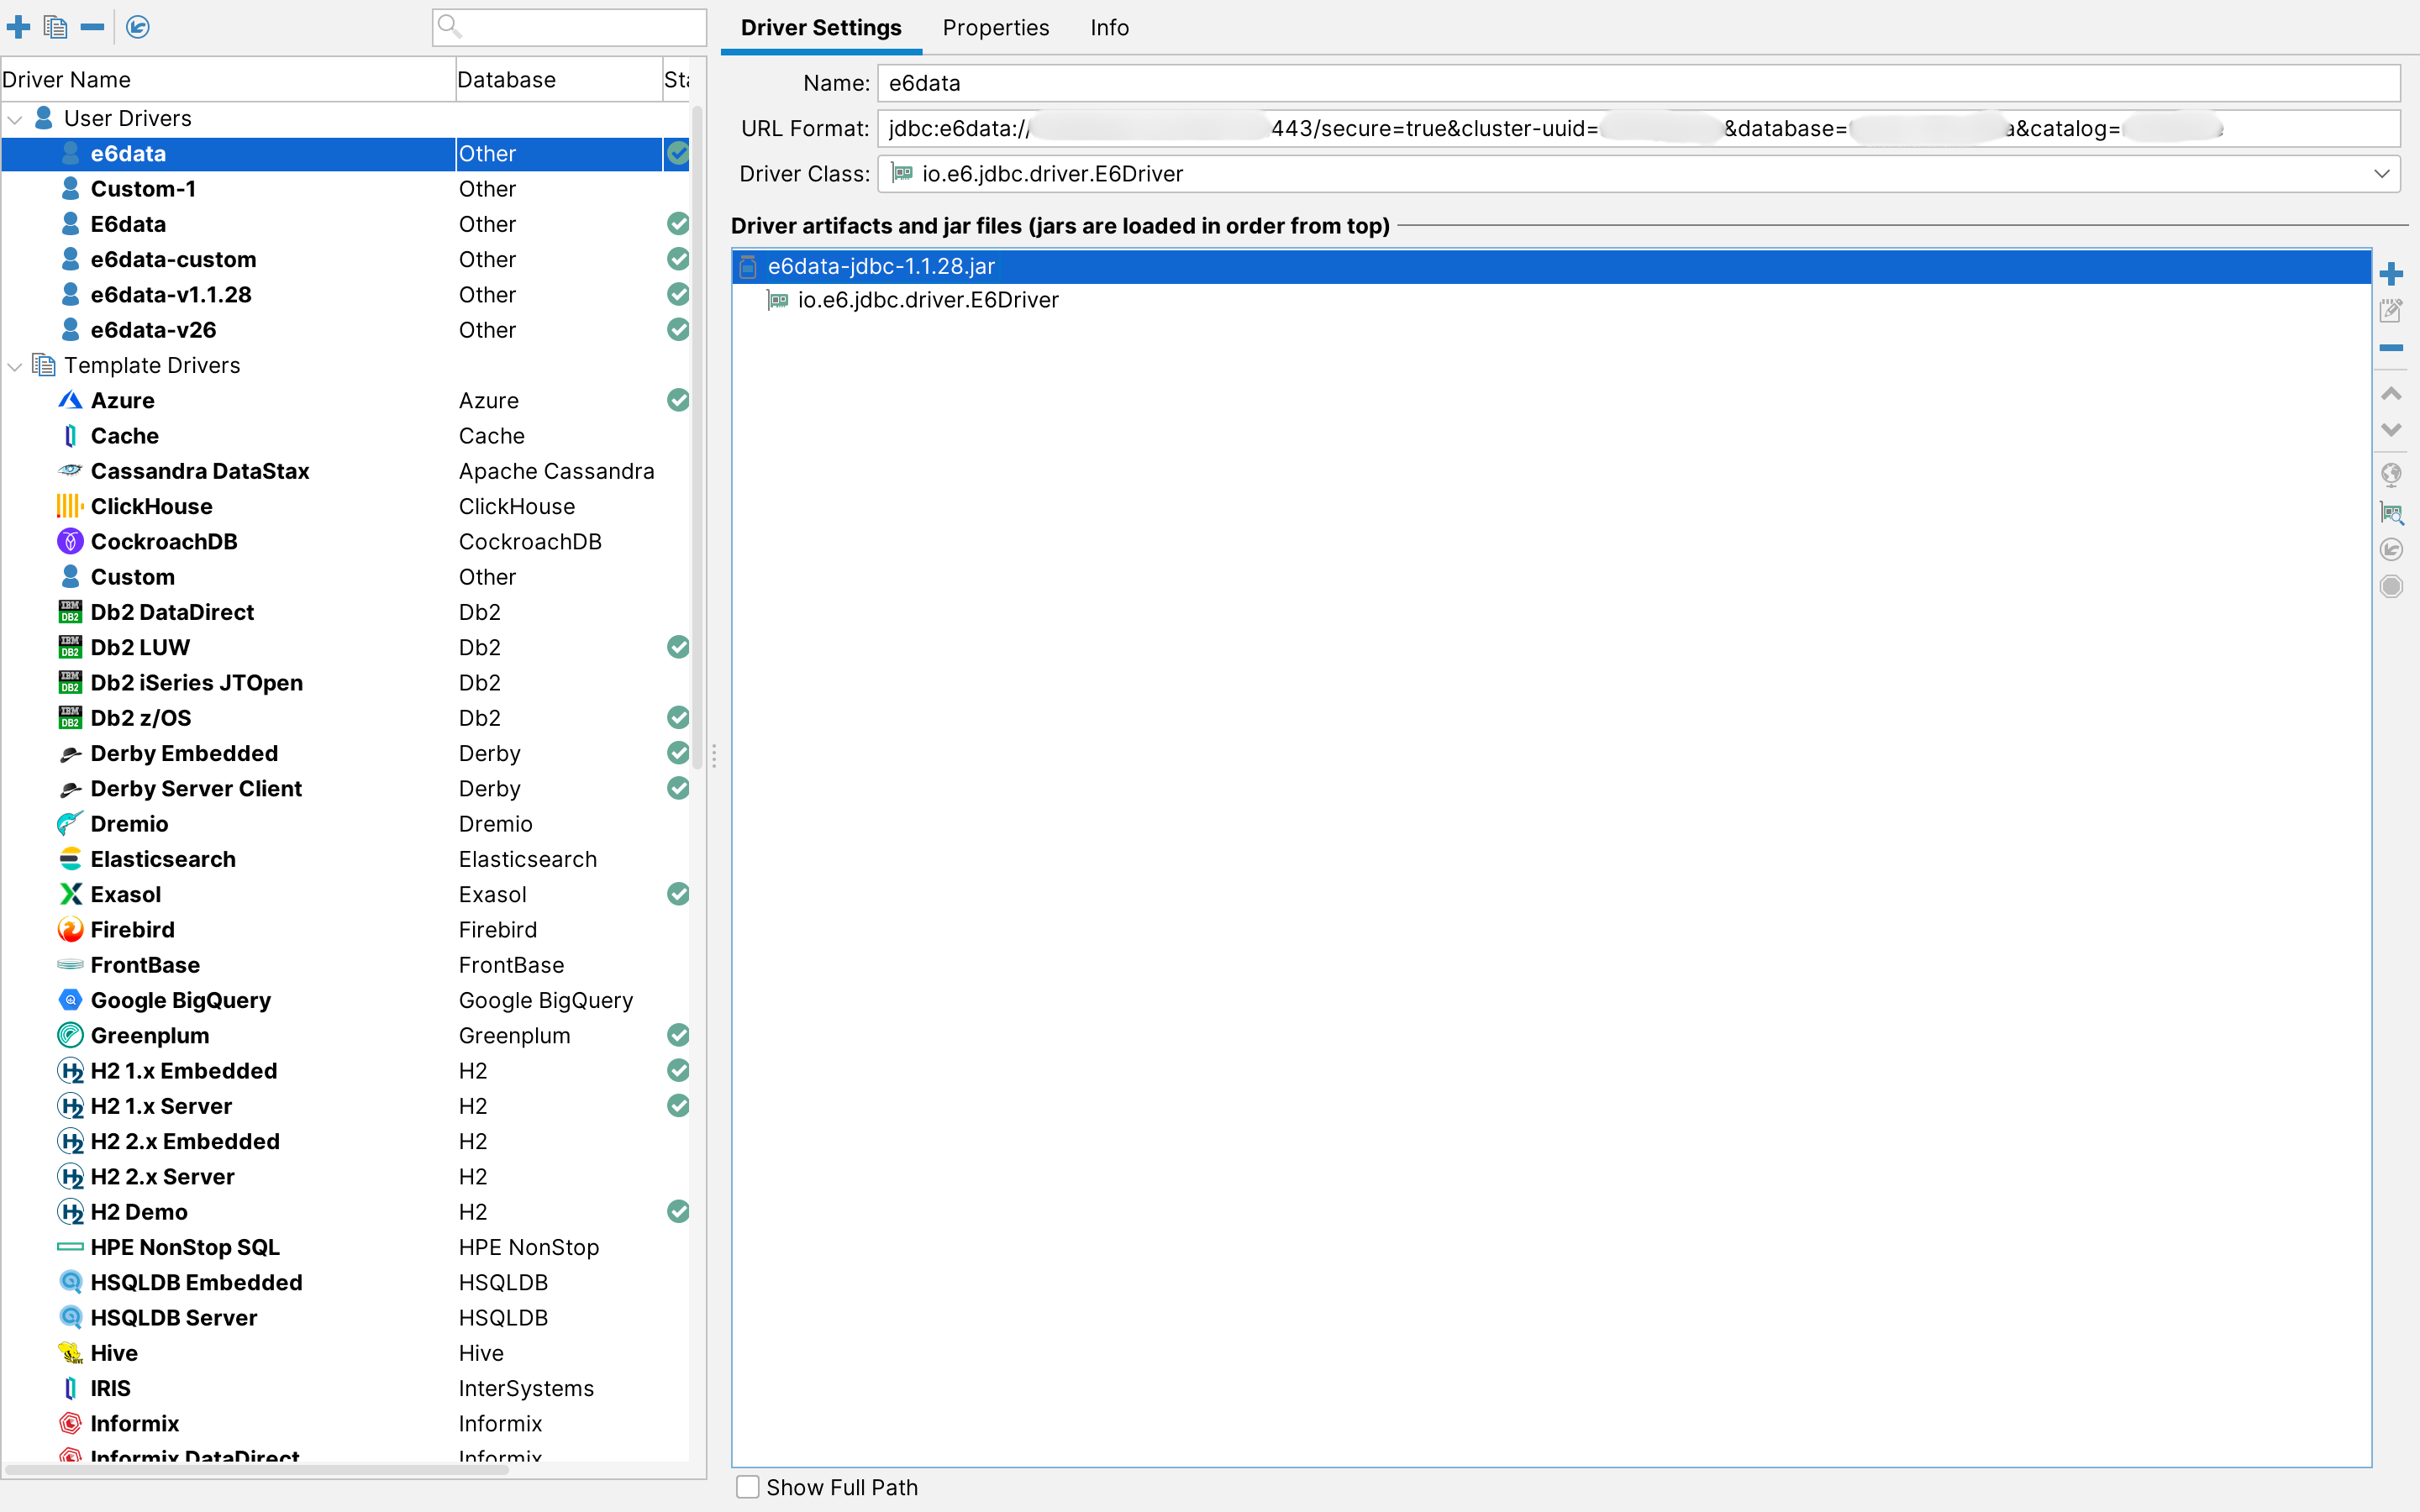
6. Click "Connect" to add the JDBC jar through the driver manager.
7. Now, open the Driver Manager, provide the name, and JDBC connection string, and add the driver here.
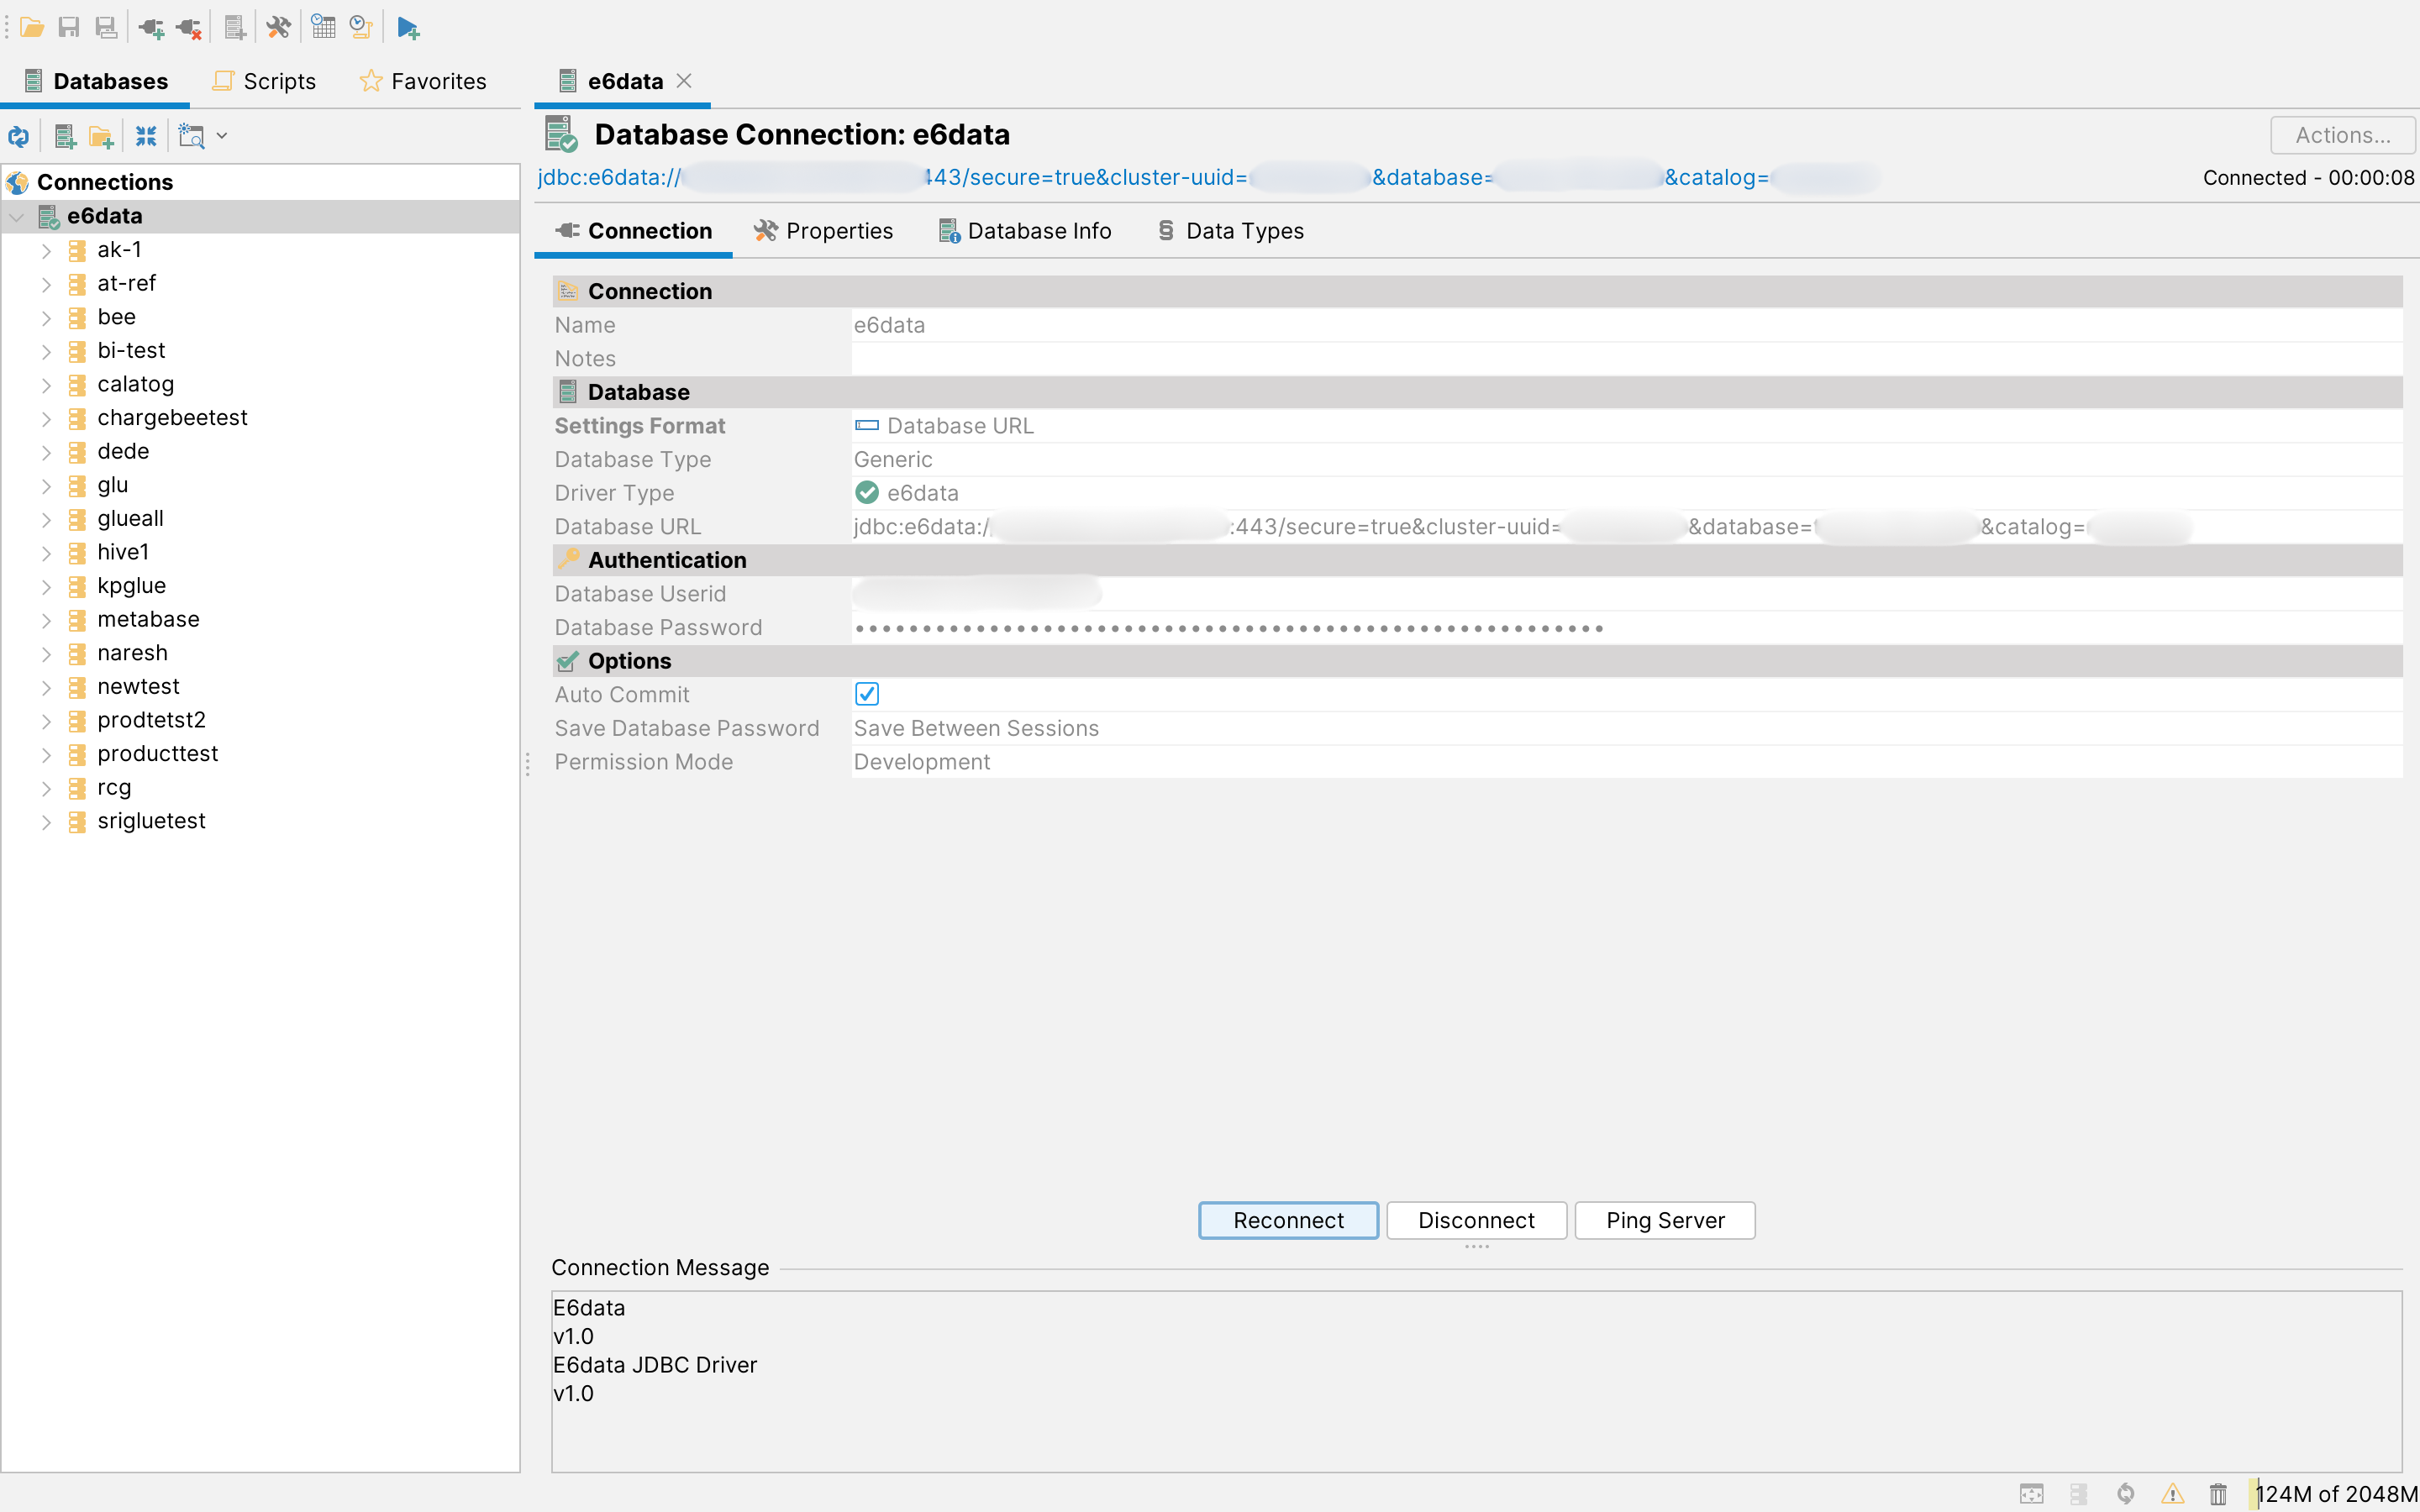
8. Go to the database connection, add the database URL, database user ID, and password, and click on "Connect."
## TLS/HTTP
e6data utilizes globally trusted certificates, ensuring that the host and port provided by the connection dialogue are adequate. Any e6data cluster necessitating authentication must also employ TLS/HTTPS. If adhering to globally trusted certificate best practices, utilize the cluster’s HTTPS URL in the connection string as detailed in the aforementioned steps. (Only required for TLS connectivity type of endpoints.)